Get your 20 FREE Printable Wedding Photo Props
As an Amazon Associate I earn from qualified purchases.

Photo booths make weddings, parties, showers and get-togethers so much fun! If you don’t want to pay the expensive prices that Photo Booth companies charge, here’s an easy way to set up a DIY photo booth using your iPad or iPhone.
(Using an iPad is preferred because it will free up your iPhone for regular use during your event and has a bigger surface area for your guests to interact with).
Step 1
Design Your Photo Booth Space
Design your photo space around the theme of your event. There are lots of creative ways to design a photo area that won’t break the bank. You can create a backdrop using a printed backdrop, fabric shower curtain, a regular curtain, wrapping paper or other decorations.

I’ve found several themed shower curtains for weddings and holiday themes on Amazon and Wish for under $20. You can purchase a backdrop stand or tack the curtain to a wall. You can also incorporate furniture pieces, balloons, floral pieces, hay bales or anything that fits your style – just get creative with it!
SHOP LISAS’S FAVORITE Backdrop Stands

Then, be sure to set the backdrop up in a location that won’t block traffic flow for your event. Think of a corner or wall of unused space for the setup.
SHOP LISA’S FAVORITE BACKDROPS


Step 2
Setup the iPad/iPhone
Next, you’ll need a tripod to setup and attach an iPhone or iPad, with the front camera facing forward. Be sure to charge the device beforehand and you’ll want to setup “Guided Access” on the device so guests can open and take photos easily, without accidentally messing up the photo settings.
Then, open the camera app and flip the view to forward facing, as if you were about to take a selfie. Set the timer on the photo to 3 seconds. Make sure your backdrop is positioned correctly in the photo and take a few test shots. You then have the option to share the photos by text, AirDrop, social media, etc. I have a video above to show you how to access these options on your iPad or iPhone.
SHOP MY FAVORITE TripoDs


Paid Photo Booth App option
Of course, if you’d like a little fancier option, and don’t mind spending a few dollars (from $1 to $80) , there are some pretty cool photo booth apps out there for purchase. The pictures you see in this post were taken using the Pocketbooth Party photo booth app. I started with the .99 cent version (called Pocketbooth) and used it for a couple of holiday parties. It was a hit, a lot of fun and easy to use.
I do recommend the $1.99 version if you’re looking for a budget-friendly option. You can also AirPrint or share via text, email and social media right from the app. However, it only has a 3 and 4 pose option for the photo strips. And most social media platforms do not support that size photo, which will cut off portions of the photo strip when shared online. It also does not have a customizable skin to add a colored or themed border and event title and date. But, it’s definitely a great option for the price and is compatible with iPhones as well. Here’s the front screen your guests will use, settings inside the app and a preview of what the 4-pose strip looks like with the $1.99 version:

I eventually upgraded to the Pocketbooth Party photo app. I wanted more versatility in adding colored borders and event titles/dates. It also has an online gallery to share the photos. The Party version costs around $19.99. However, there are many different photo booth apps at varying price points available for download in the App Store. Depending on your budget and needs for your particular event, there’s sure to be one to suit you.
Step 3
Photo Booth Props
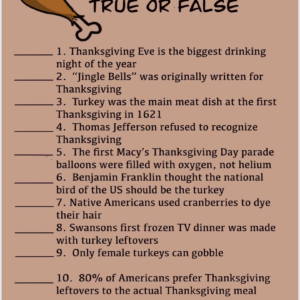
All great photo booths have plenty of fun photo props for guests to use in their photos. And you can get photo props from several different places – stores sell them online, there are free printable props online to download, print and cut. I have free, printable, Wedding-themed ones here and Thanksgiving-themed ones here and plan to add more for different events in the future. The Dollar Tree also has lots of fun items that guests like to use, such as glasses, feather boas and tiaras.
SHOP MY FAVORITE PROPS


Step 4
Photo Booth Directional Signs
If your event space is large and the photo booth is setup in a conspicuous space, you’ll want to have some directional signs pointing guests to the area. These can also be found online for free or to purchase. It is a good idea to also have a sign that tells your guests how to operate the photo booth – which button to click to take the photos, how to share the photos, how to print the photos, any hashtags associated with the event or a link to a website where the photos will be shared online.
SHOP LISA’S FAVORITE PHOTOBOOTH SIGNS


Step 5
Photo Booth Lighting
And last, but certainly not least, is making sure there is enough lighting. If your event is during the day and there is enough natural lighting or if it is in a well lit area, there may be enough lighting for your photos. However, if your event will be at night or in a dimly lit area, you may need to purchase some lighting. Most of us have heard of ring lights by now. And they really do make a difference. But they’re pretty pricey! I’ve used these lights instead and they’ve worked well. Remember to bring an extension cord and power strip for any equipment that needs to be plugged in for power!
SHOP LISA’S FAVORITE LIGHTING


And that’s all you’ll need to setup a DIY photo booth for your next event using your iPad or iPhone! It will surely make lasting memories you’ll cherish.
Supplies Needed List:
Click images to view/buy products. As an Amazon Associate I earn a small commission from qualified purchases.


Leave a Reply